

If you work with advertising traffic, sooner or later there comes a need to strengthen the protection of campaigns and accounts from bans. One of the effective ways to do this is to use individual traffic filtering rules.
In Cloaking House, a special tool is provided for this purpose — custom filtering lists, which allow you to flexibly control which traffic will reach the Offer Page and which will be blocked or redirected.
In this article, we will take a detailed look at what filtering lists are, why they are used and how they work. You will learn what parameters can be included in filtering lists, what the difference is between White List and Black List, and why proper configuration of these lists can significantly increase the security and stability of advertising campaigns.
What are filtering lists?
Filtering lists — are an additional tool in the Cloaking House system that allows you to control click access to the Offer Page based on predefined parameters.
With filtering lists you can:
- allow or block access to the Offer Page for selected parameters;
- strengthen the protection of advertising campaigns from moderators, bots and unwanted traffic;
Filtering can occur based on various technical parameters of the user or their connection, for example:
- IP address;
- ISP (internet provider);
- User-Agent;
- Referer;
Thanks to this tool, you can control the traffic flow much more precisely, minimize the risk of checks from advertising platforms and increase the stability of advertising campaigns.
What types of filtering lists exist?
White List — this is a filtering list used to allow access to the Offer Page only for specific traffic based on predefined parameters. If a visitor meets the specified conditions, the system allows them to proceed to the target page.
Simply put, White List works according to the principle of “allow only the necessary traffic”. This approach allows you to control the flow of visitors more precisely and ensure that only those who meet the specified criteria reach the Offer Page.
Using White List is especially useful in situations where it is important not to lose valuable or verified traffic. For example, if you want to guarantee that clicks from certain sources, regions or networks are always allowed.
IMPORTANT: Flow rules have higher priority than White List filters. If a click does not meet the flow conditions, it will immediately be shown the White Page, even if it is added to the White List.
White List is applied only to those who have already passed the basic flow filter checks.
Black List — this is a filtering list used to deny access to the Offer Page for certain traffic. If a visitor matches the parameters specified in the Black List, the system blocks access to the target page and redirects them to the White Page.
The main purpose of Black List is to strengthen the protection of an advertising campaign by filtering out unwanted traffic. Such lists may include suspicious IP addresses, specific providers, bots, advertising network moderators or other sources that may pose a risk to the account.
Using Black List allows you to restrict access to the Offer Page more precisely and thereby increase the security of cloaking, reducing the likelihood of checks and advertising campaign bans.
How to create a filtering list?
Go to the “Filtering Lists” section in the side panel of the Cloaking House interface. Click the “Create list” button.
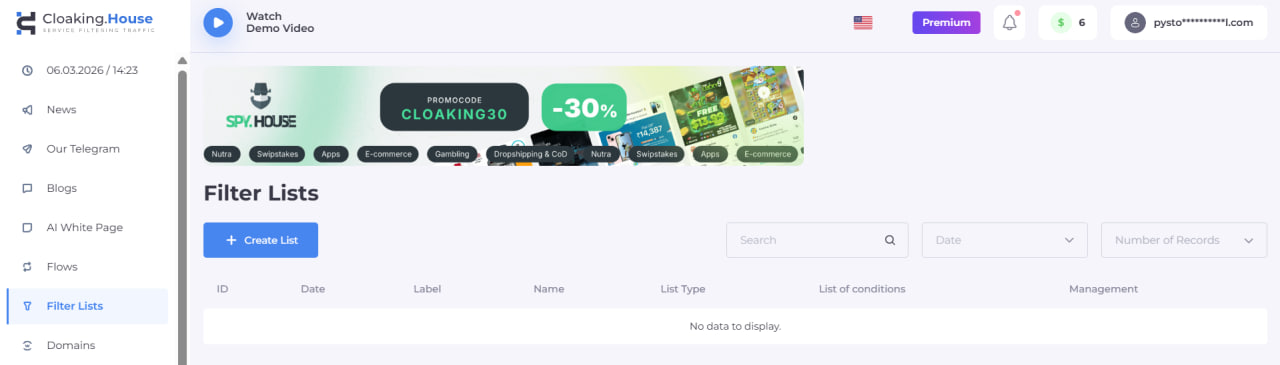
A filtering list creation menu will open in front of you.

Enter any convenient name for the list, it serves only for your orientation and convenience when configuring the flow.
Select the list type: Black List or White List.
Fill in all the fields you need. Below we will explain what each parameter is responsible for:
- IP (IP address) — this is a unique digital address of a device on the internet. When a user opens a website, the system sees their IP and can determine the approximate location, country or city. In cloaking, IP is often used for traffic filtering, for example to allow users from the required countries or block suspicious addresses.
- ISP (Internet Service Provider) — this is the internet provider through which the user connects to the internet. For example, mobile operators or home internet providers. In filtering systems, ISP helps distinguish regular users from data centers, proxies or servers that are often used by bots or moderators.
- User Agent — this is technical information that the browser automatically sends to the website. It indicates which browser, device and operating system a person is using. For example: Chrome on Android or Safari on iPhone. In cloaking, User Agent helps detect bots, automated checking systems or unusual devices.
- Referer — this is the source from which the user came to the website. It shows from which page or platform the person arrived. For example, the transition may come from Facebook, Google, an advertising network or another website. This parameter helps filter traffic by source and understand exactly where the visitor came from.
Enter each new parameter on a new line, as shown in the screenshot. After filling in all the fields, click the “Create” button.
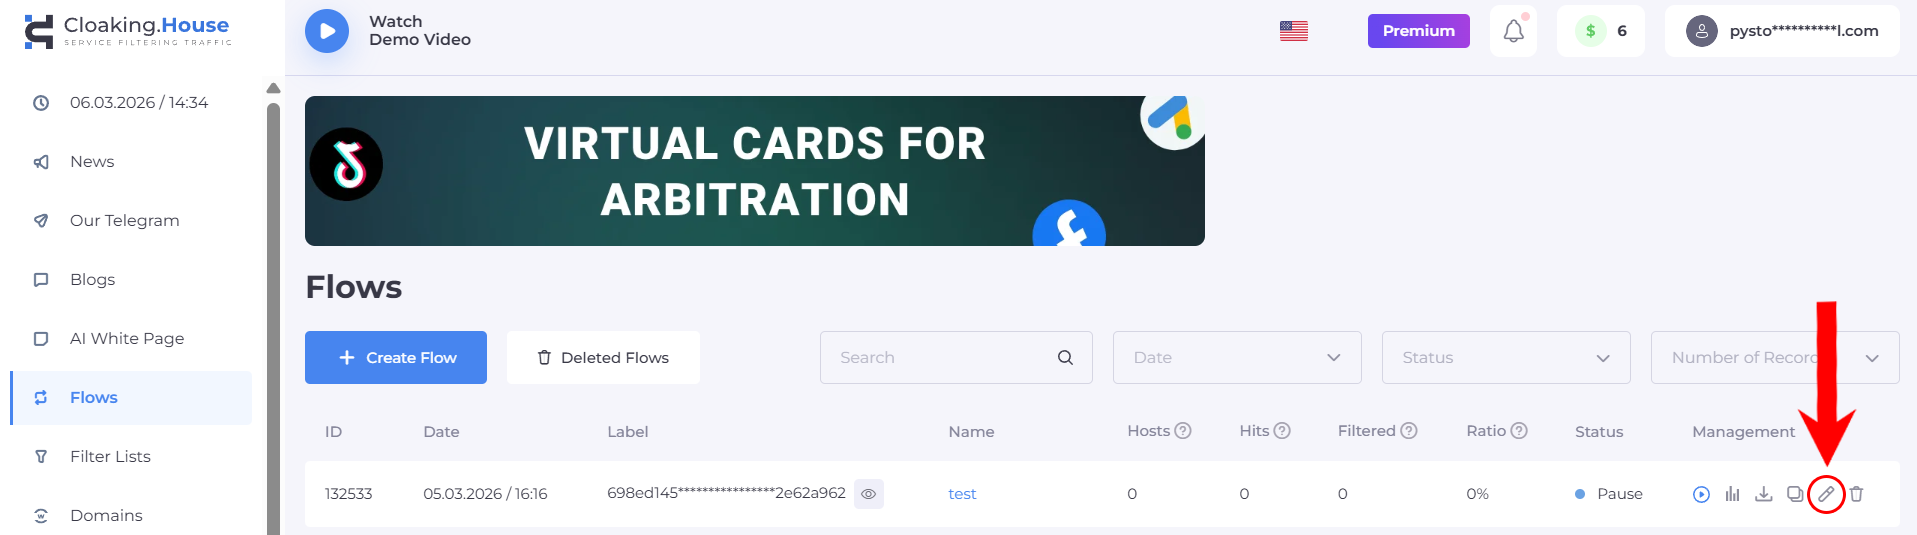
Then go to the “Flows” section, select the required flow and click the “Edit” icon.
Go to the second page of the flow settings “Filtering”, with the filter settings, and scroll down to the very bottom.
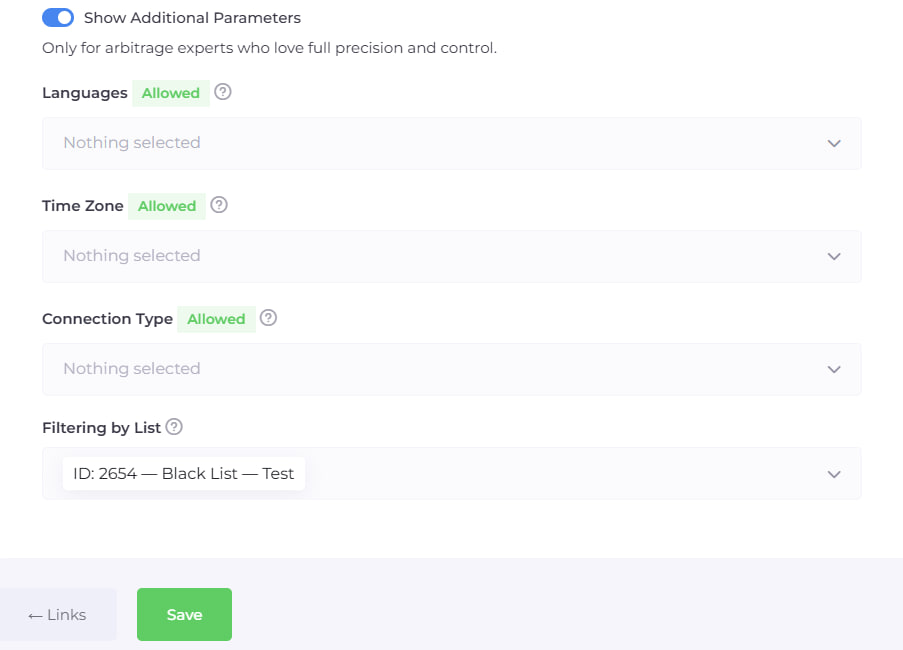
Select your filtering list in the “Filtering by list” field. To confirm the changes made to the flow settings click the “Save” button.
Congratulations, your filtering list is now activated and fully working.
Summary
Filtering lists are an important tool for more precise control of advertising traffic and increasing campaign security. Proper use of White List and Black List allows you to flexibly manage access to the Offer Page, filter out unwanted users and at the same time not lose high-quality traffic.
With the correct configuration, filtering lists help strengthen cloaking, reduce the risk of checks and make the launch of advertising campaigns more stable and secure.


Be the first to share your opinion!
We value your feedback — share your thoughts.