

Welcome to our lesson, where we will take a detailed look at the ready-made cloaking link integration method.
This approach is one of the simplest and fastest ways to set up cloaking, and it does not require purchasing hosting.
We will walk you through the configuration of a ready-made link step by step so you can launch the process as quickly and efficiently as possible.
Ready to begin? Let’s get started.
First, to use this method, go to the “Domains” tab.
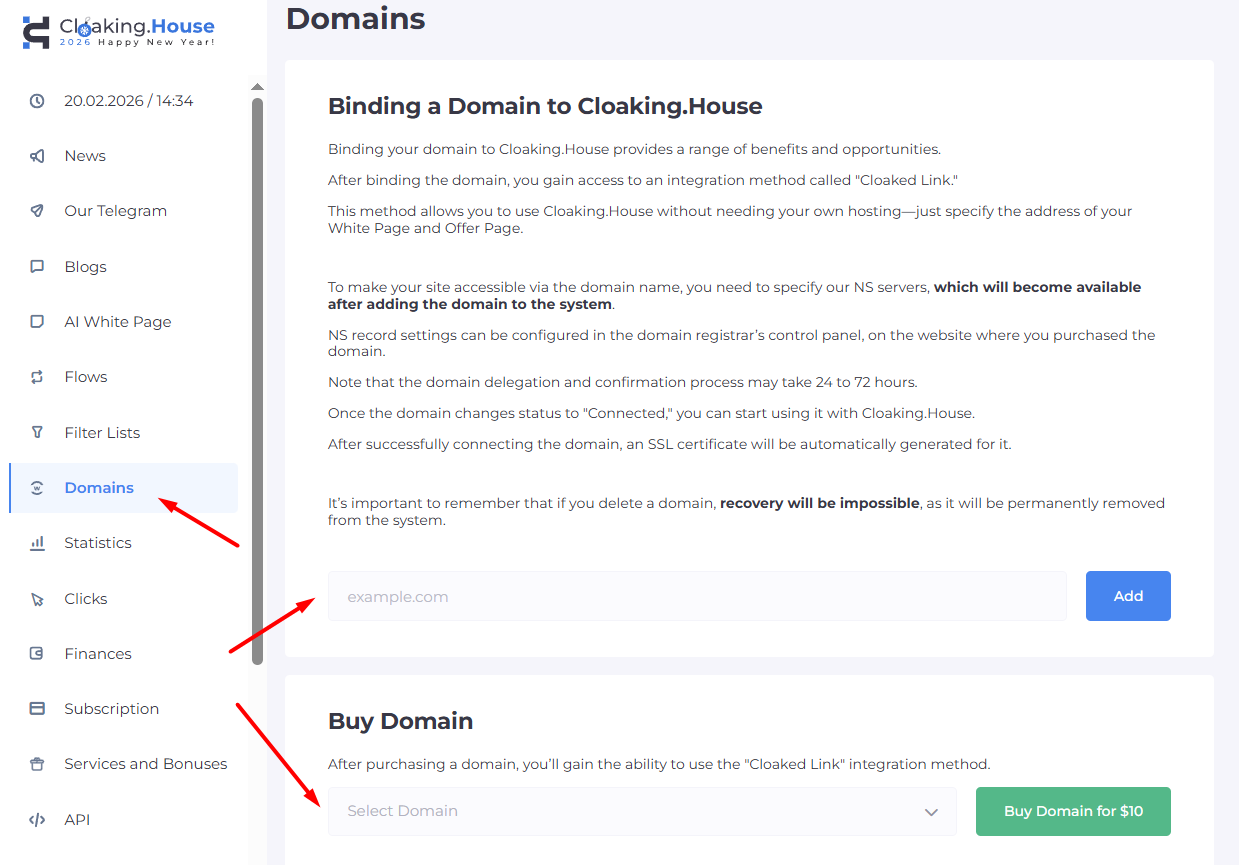
In the “Domains” tab, you can purchase a ready-to-use domain. Such a domain will typically be available within 5–10 minutes after purchase.
You can also add your own domain.
If the domain purchase process is clear, then to park your own domain, simply enter its name in the appropriate field and click “Add.”

The added domain will appear in your domain list, and you will be provided with NS records. These NS records must be specified at your domain registrar — the service where you purchased the domain.
If you encounter any difficulties adding the domain’s NS records, you can always contact your registrar’s support team for assistance.
After adding the domain and specifying the NS records, you will need to wait a short time for the domain to be parked. Once parking is successful, the domain status will change from “Pending” to “Connected.”
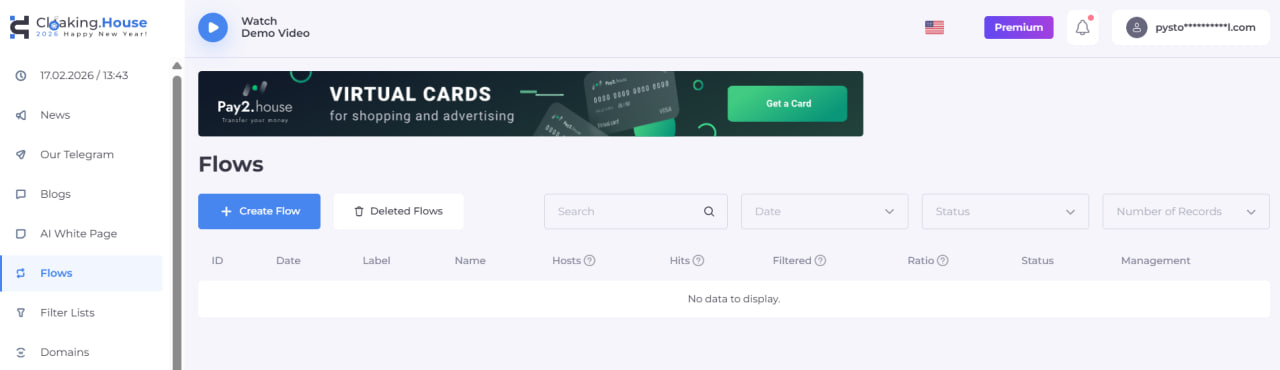
At this stage, you can proceed to creating a flow. Go to the “Flows” tab and click “Create Flow.”
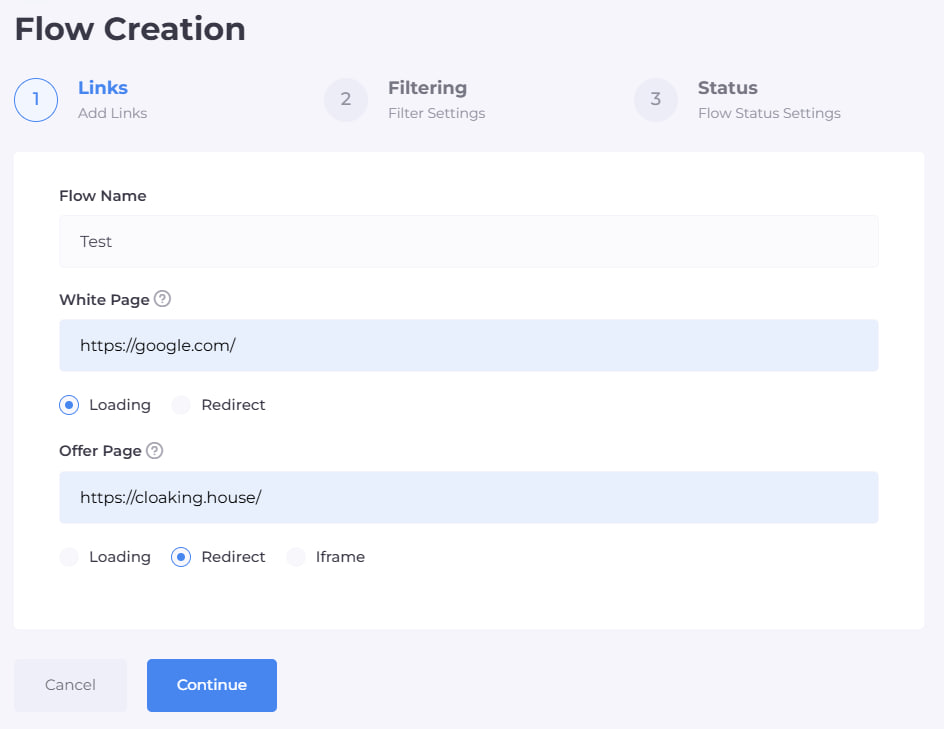
You now need to assign a name to the flow — it can be anything.
- Specify the White Page, meaning the site that cloaking will display for unwanted traffic (moderation, bots).
In this example, we will use Google, but you may choose any other website If you select the “Loading” method, the cloaking system will copy and display the main page of the specified site.
If you choose the “Redirect” method, users will be redirected to the address you provide.
- In the “Offer Page” field, insert your affiliate link or the URL of your offer. Select the “Redirect” method.
By clicking “Continue” you will move to the second page of the flow settings. Here, detailed traffic filtering configuration is available. The system provides numerous filters for fine-tuning.
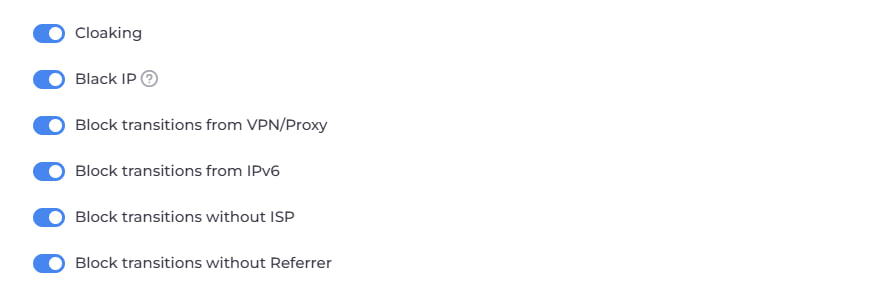
Cloaking Filter — a basic protection mechanism designed to block bots and verification traffic from any advertising channels. When activated, suspicious visits are automatically redirected to the White Page.
Black IP Filter — triggered if the system previously detected unwanted activity from a specific IP address. This may occur when bots or moderators are identified, when the country or provider cannot be determined, or when visits originate from unrecognized devices. When triggered, the visitor is redirected to the White Page.
VPN / Proxy Filter — activated when a visitor’s IP address is recognized as belonging to a proxy server or VPN. This filter only works when explicitly enabled. When triggered, traffic is sent to the White Page.
IPv6 Filter — applied when the system detects that the visit originates from an IPv6 address. When triggered, the White Page is shown.
ISP Filter — triggered when the user’s internet provider cannot be determined via IP address. When activated, the White Page is displayed.
Referrer Filter — triggered when the traffic source (Referer) is missing or cannot be identified, including direct URL entries in the browser. When activated, the visitor is redirected to the White Page.
Next, we have more detailed configuration options for your cloaking link:
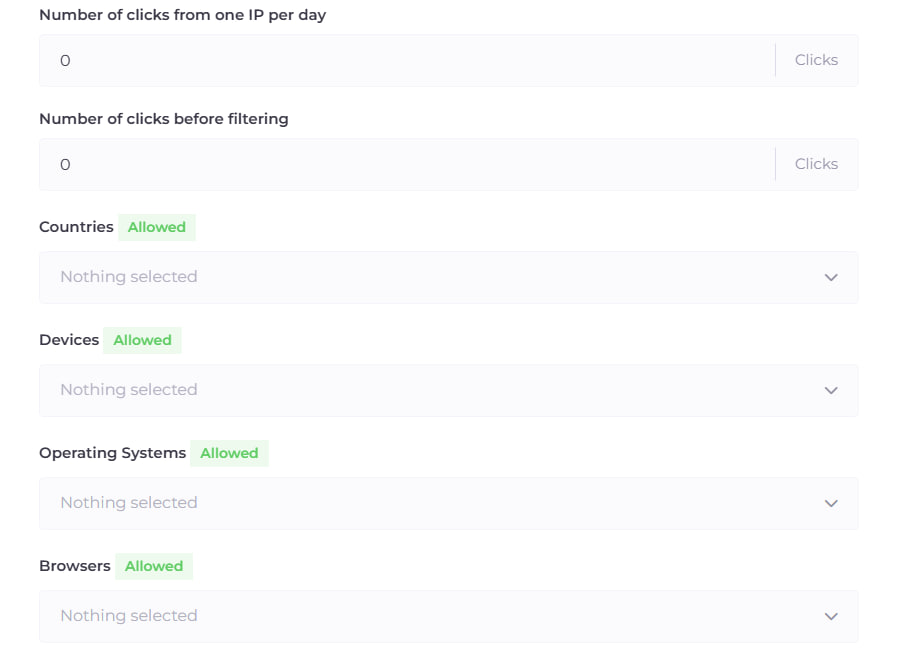
Clicks per IP per Day — allows you to set the maximum number of visits permitted from a single IP address within a day. Once exceeded, all further visits from that IP will be redirected to the White Page.
Clicks Before Filters Activation — defines the number of visits during which cloaking is not applied. Users within this range will always see the White Page. Filtering only begins after the defined threshold is reached.
Countries — triggered when the visitor’s geolocation cannot be determined or if the visit originates from a region not included in the allowed list. In such cases, the White Page is displayed.
Devices — triggered when the device type cannot be identified via User Agent or does not match allowed settings. The White Page is displayed.
Operating Systems — applied when the OS cannot be recognized or is not permitted. When triggered, the user is redirected to the White Page.
Browsers — triggered when the browser cannot be identified or is not included in the allowed list. The White Page is shown.
For advanced media buyers and webmasters, additional filters provide greater precision and control.

Languages — applied when the browser language cannot be determined or is not allowed. When triggered, the White Page is displayed.
Time Zone — triggered when the IP-based time zone does not match permitted settings. This helps with accurate geographic segmentation and anomaly detection. When activated, the White Page is displayed.
Connection Type — triggered when the detected internet connection type is not permitted. Supported types include:
- Satellite — internet via satellite channels.
- Corporate — access via company infrastructure, data centers, or secured networks.
- Mobile — internet from cellular operators (3G / 4G / 5G).
- Cable / DSL — standard wired connections.
This filter helps block potentially risky or irrelevant traffic, including visits from data centers or corporate networks. When triggered, visitors are redirected to the White Page.
After completing the configuration, go to the “Flows” tab and click the “Download” icon for the desired flow.

You will see a window where you must select the integration method “Cloaked Link.”
Then select your domain name, after which the system will generate a ready-to-use link that you simply need to copy.
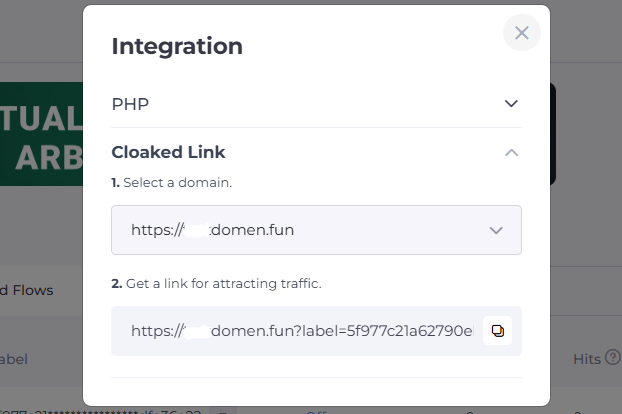
The process is now complete — you have obtained a fully functional cloaking link ready for use.


Be the first to share your opinion!
We value your feedback — share your thoughts.